Pre-Wedding Shoot Planning Checklist for Photographers
Pre-wedding shoot planning checklist helps photographers prepare the complete session and give couples a smooth, professional experience.

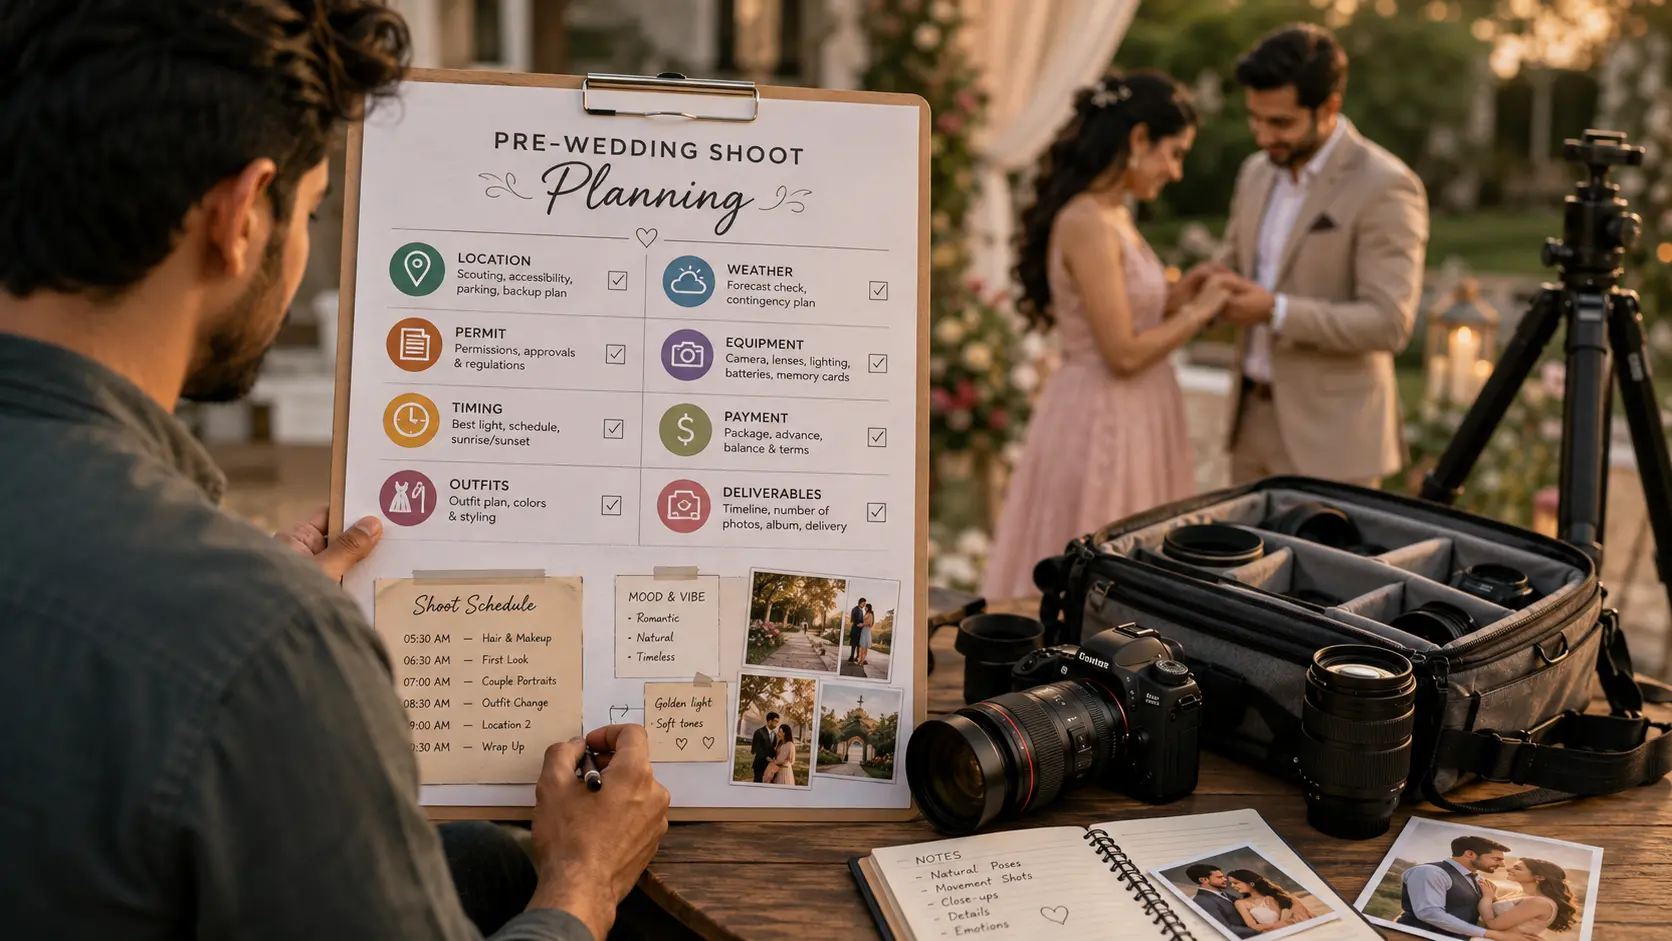
A successful pre-wedding shoot depends on more than a beautiful location and a good camera.
The photographer must coordinate the couple, location permissions, travel, outfits, lighting, weather, equipment, payments and final deliverables. When even one of these details remains unclear, the shoot can lose valuable time before the first photograph is taken.
This pre-wedding shoot planning checklist helps photographers prepare the complete session and give couples a smooth, professional experience.
Confirm the Couple’s Expectations
Begin by understanding what the couple wants from the shoot.
Ask about:
- Preferred photography style
- Mood or theme
- Number of locations
- Outfit changes
- Favourite poses or references
- Intended use of the photographs
- Video or reels requirement
- Any personal story they want reflected
Some couples want natural photographs in one quiet location. Others expect a cinematic pre-wedding shoot with multiple outfits, props and destinations.
Do not begin location planning until the expected style and scope are clear.
Select a Location That Supports the Concept
The best pre-wedding photoshoot location is not always the most popular one.
Choose a location based on:
- The couple’s preferred visual style
- Travel time
- Crowd levels
- Light direction
- Outfit suitability
- Privacy
- Accessibility
- Changing facilities
- Parking
- Nearby backup locations
Visit or research the location before the shoot. Check recent photographs, entry rules and seasonal conditions instead of relying only on old social media posts.
A location that looks empty online may be crowded on weekends. A lake may be dry during summer. A garden may restrict professional cameras or outfit changes.
Check Photography Permissions and Permits
Do not assume that professional photography is allowed because the location is publicly accessible.
Confirm:
- Photography permit requirements
- Entry fees
- Camera charges
- Drone permissions
- Crew limits
- Tripod or lighting restrictions
- Commercial-shoot charges
- Opening and closing times
- Rules for props or vehicles
Keep written confirmation or payment receipts available on the shoot day.
When the couple is responsible for a location fee or permit, mention it clearly before confirming the quotation.
Plan the Shoot Around the Best Light
Timing affects both image quality and the couple’s comfort.
Golden-hour sessions usually work best shortly after sunrise or before sunset. Morning shoots may offer softer light, cooler weather and fewer visitors. Evening sessions may be more convenient but can become crowded.
Build the schedule backwards from the preferred light.
For example:
- Crew arrival and setup: 5:15 AM
- Couple ready at location: 5:45 AM
- First look: 6:00 AM
- Main session: 6:15–8:00 AM
- Outfit change: 8:00–8:30 AM
- Second setup: 8:30–9:30 AM
Include travel, changing and walking time. A two-hour shoot does not mean the entire booking can be completed within two hours when several locations and outfits are involved.
Coordinate Styling and Outfits
The photographer does not need to become a stylist, but basic coordination prevents avoidable visual problems.
Ask the couple to share outfit photographs before the shoot.
Review:
- Colours against the selected location
- Formal versus casual styling
- Footwear for the terrain
- Accessories
- Hair and makeup timing
- Backup outfit
- Changing arrangements
- Wrinkle and stain preparation
Encourage the couple to avoid carrying too many outfits. Multiple changes can reduce actual photography time and make the final set feel disconnected.
Two well-planned looks are often more effective than five rushed ones.
Prepare a Simple Shot Flow
A pre-wedding photography checklist should guide the session without making every frame feel staged.
Plan a loose sequence:
- Simple standing and walking photographs
- Wide location-based compositions
- Close portraits
- Natural interaction
- Movement-based photographs
- Outfit or location change
- Creative or cinematic frames
- Final priority shots
Ask the couple about physical limitations, comfort with public affection and poses they want to avoid.
The aim is to give direction while allowing genuine expressions to develop.
Create a Weather and Location Backup Plan
Weather can change even when the forecast looks clear.
Prepare for:
- Rain
- Strong wind
- Harsh sunlight
- Fog
- Extreme heat
- Muddy or inaccessible paths
- Unexpected crowds
- Location closure
Confirm one backup option before the shoot.
This may be:
- An indoor studio
- A covered architectural location
- A café with permission
- A second outdoor venue
- A reschedule policy
Tell the couple when the final weather decision will be made and who will bear any rescheduling or permit costs.
Confirm Equipment and Backup Readiness
Prepare equipment according to the planned location and visual style.
The checklist may include:
- Primary camera
- Backup camera body
- Required lenses
- Charged batteries
- Formatted memory cards
- Reflector
- Portable lighting
- Light stands
- Rain protection
- Lens-cleaning kit
- Power bank
- Drone and spare batteries, where permitted
- Data backup device
For remote locations, carry more power and storage than the expected requirement.
Do not test unfamiliar equipment for the first time during a paid pre-wedding shoot.
Define Deliverables Clearly
Clients may interpret “pre-wedding photos” differently.
Confirm exactly what the package includes:
- Approximate number of edited photographs
- Photo resolution
- Online gallery
- Download access
- Teaser photographs
- Reels
- Highlight video
- Full-length film
- Printed album
- Delivery timeline
- Number of revision rounds
Avoid promises such as “all photos will be delivered” unless the meaning is clearly defined.
The couple should understand whether they will receive selected edited images, all usable images or a fixed number of final photographs.
Confirm Payment Before the Shoot
Do not leave the payment structure unclear until the shoot day.
Record:
- Total package amount
- Advance received
- Permit or location costs
- Travel charges
- Makeup or styling responsibility
- Additional-hour charges
- Rescheduling charges
- Remaining balance
- Payment due date
A practical payment structure may include an advance to reserve the date and the remaining amount before the shoot or before final delivery.
Send a written payment acknowledgement whenever money is received.
Share a Final Pre-Shoot Brief
Send the couple one consolidated message 24 to 48 hours before the shoot.
Include:
- Reporting time
- Exact meeting point
- Location contact
- Outfit sequence
- Makeup completion time
- Items to carry
- Expected weather
- Payment status
- Photographer’s contact number
- Backup plan
A useful message could be:
Your pre-wedding shoot is confirmed for Saturday at 6:00 AM. Please arrive by 5:45 AM with both outfits ready. We will begin at the lakeside and move to the heritage location for the second look. The forecast is clear, but we will confirm again on Friday evening.
This reduces last-minute calls and gives everyone the same information.
Pre-Wedding Shoot Planning Checklist
Before leaving for the shoot, confirm:
- Client concept and references approved
- Location and backup location confirmed
- Permits and entry fees completed
- Timings shared
- Outfits reviewed
- Makeup schedule confirmed
- Shot flow prepared
- Weather checked
- Crew briefed
- Equipment tested
- Batteries charged
- Memory cards formatted
- Deliverables documented
- Advance and balance recorded
- Final client brief sent
A pre-wedding shoot becomes easier when the photographer plans the experience, not just the photographs.
Clear preparation protects shooting time, reduces client confusion and helps the couple arrive relaxed and ready. The creative work can then happen without the session being interrupted by missing permissions, unsuitable outfits, unclear payments or avoidable scheduling problems.