Photography Gallery Delivery Checklist: 25 QC Checks Before You Send the Client Link
Use this 25-point photography gallery delivery checklist to QC files, privacy, downloads, mobile viewing, client instructions and the final link before delivery.

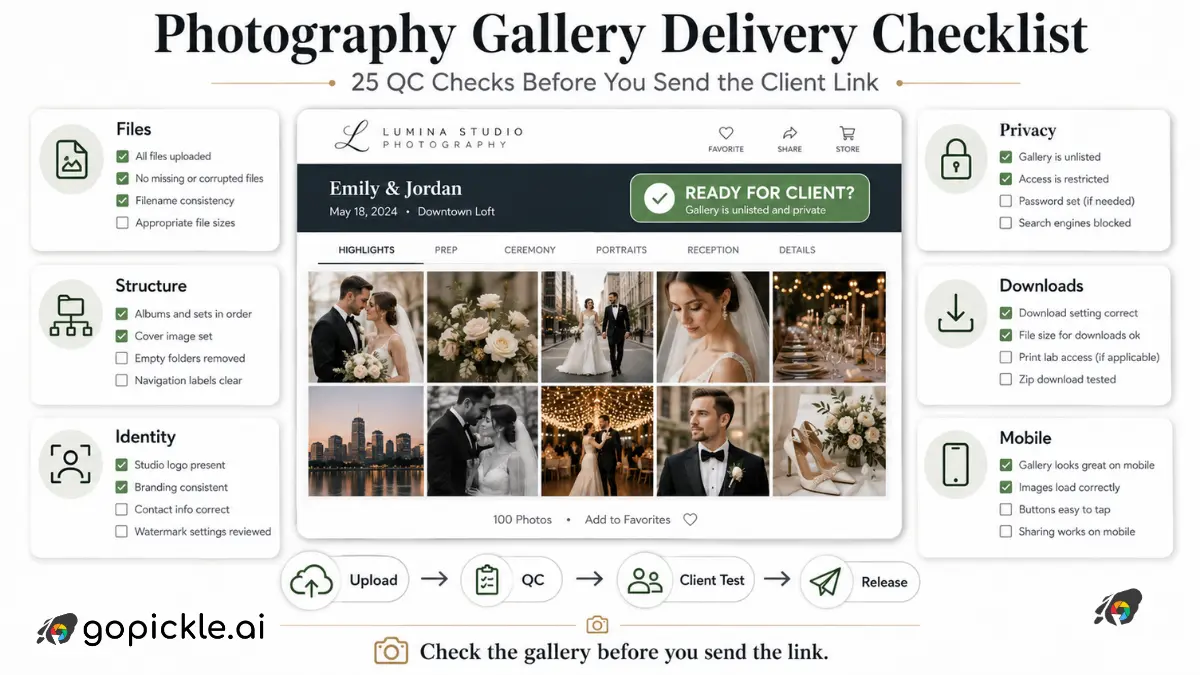
A finished edit is not necessarily a finished delivery.
Between exporting the photographs and sending the client their gallery link, there is a small release process that deserves the same discipline photographers apply to culling, colour correction and retouching. The wrong cover photograph, an incomplete collection, a disabled download button or a gallery accidentally left public can turn weeks of careful production into an avoidable client problem.
At GoPickle, we find it useful to treat client gallery delivery more like publishing than uploading. The files should be checked, the gallery should be checked, and the actual client experience should be tested before the link leaves the studio.
This photography gallery delivery checklist gives you 25 practical QC checks for that final stage. It works whether you deliver weddings, portraits, commercial assignments, corporate shoots or events, and whether you use dedicated client gallery software or another online photo delivery system.
Files and export QC
The first checks happen before gallery presentation matters. A beautiful online gallery cannot compensate for the wrong files being inside it.
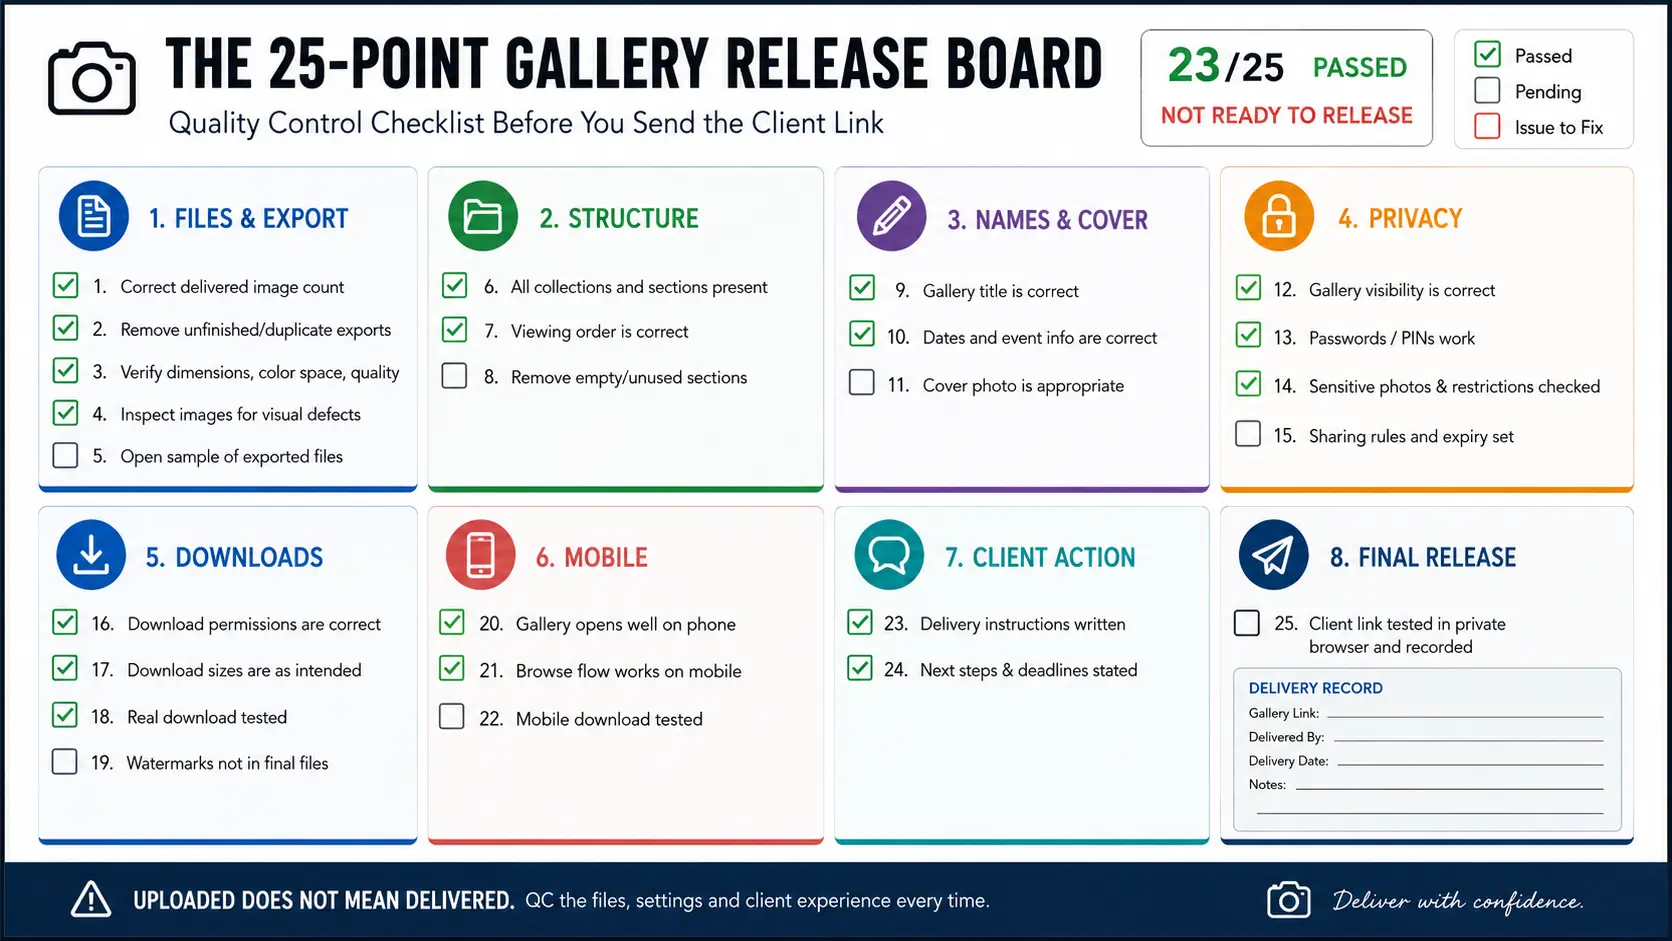
1. Confirm that the delivered image count is correct
Compare the gallery against the approved final set rather than relying on memory. For a client-selected job, verify the gallery against the locked selection. For photographer-curated delivery, compare it with the final export collection.
A missing photograph is easier to catch before delivery than after a client asks why an expected image has disappeared.
2. Remove unfinished and duplicate exports
Look for _final, _final2, alternate crops, test exports, proof-resolution files and duplicate frames that were never intended for delivery. If both colour and black-and-white versions are intentionally included, make that choice obvious rather than leaving the client wondering whether one version is accidental.
3. Verify export dimensions, colour space and compression
Check that final files were exported using the studio's intended delivery settings. Resolution should match the client's intended use, JPEG quality should not introduce visible artefacts, and colour space should be appropriate for the delivery workflow.
Do not assume the export preset used on the previous job was correct for this one.
4. Inspect the photographs for final visual defects
Do a last visual pass for missed sensor spots, strange crops, editing masks, retouching artefacts, banding, accidental borders and inconsistent colour treatment. Pay particular attention to hero photographs and images that received complex retouching.
5. Open a sample of the actual exported files
Do not QC only inside Lightroom, Capture One or Photoshop. Open representative JPEGs from the exported delivery folder, including a few large files and images from different parts of the job. The files being delivered are the product the client receives.
Gallery structure and ordering
A large gallery is easier to understand when its organisation reflects how the client remembers the assignment rather than how the studio stored the files internally.
6. Check every collection and section
Make sure all intended groups exist and contain the correct photographs. A wedding might use Preparations, Ceremony, Portraits and Reception; a corporate assignment might use Executive Team, Staff Headshots and Workplace Images.
The internal folder structure does not have to become the client-facing structure.
7. Review the viewing order
Open each collection as a client would and scroll through it. Check chronology, visual rhythm and obvious sequencing problems. A reception photograph appearing halfway through the ceremony may be technically harmless but still makes the gallery feel unfinished.
8. Remove empty, duplicated or unnecessary sections
Template-based gallery creation can leave behind unused collections. Delete empty categories, repeated headings and sections that contain only one accidental upload.
Names, dates and cover image
Gallery metadata is easy to overlook because photographers naturally focus on photographs first. Clients notice both.
9. Verify the gallery title
Check spelling, capitalisation and naming conventions. For personal work, confirm client names carefully. For commercial work, use the agreed company, campaign or project name rather than an internal shorthand.
Avoid client-facing titles such as Smith_Wedding_Final_V3.
10. Check dates and event information
If the gallery displays a wedding date, session date, project description or location, make sure it belongs to this assignment. This matters particularly when galleries are duplicated from templates or previous jobs.
11. Choose the cover photograph deliberately
The cover is often the first finished photograph the client sees. Make sure it is strong, correctly cropped in the gallery layout and appropriate for the people who may receive the link.
A dramatic photograph that works inside the gallery may not necessarily work as its public-facing or shared cover.
Privacy and access
Gallery QC is also privacy QC. Weddings, newborn sessions, family portraits, corporate events and private functions may contain images that clients do not expect to be openly discoverable.
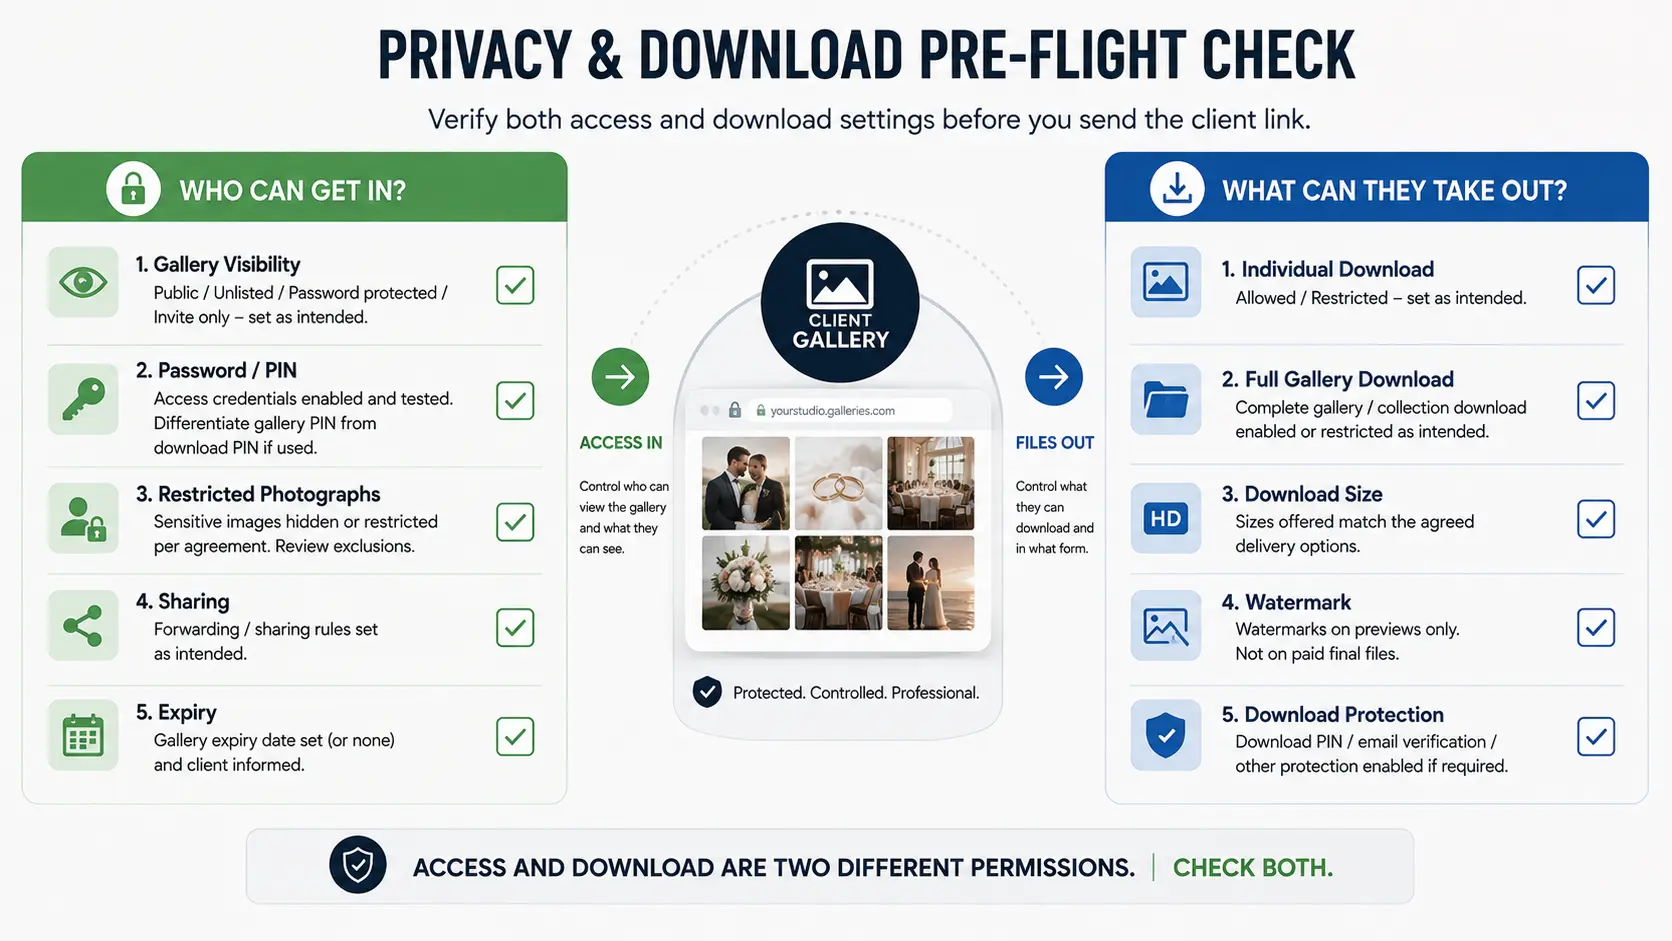
12. Confirm the gallery's visibility
Check whether the gallery is public, unlisted, invitation-only, password protected or otherwise access-controlled according to your agreement with the client.
Never rely on the assumption that a newly created gallery inherited the right setting.
13. Test passwords, PINs and access credentials
If access protection is enabled, use the exact credentials you intend to send and confirm that they work. Also distinguish gallery access credentials from download credentials if your platform treats them separately.
For a deeper privacy workflow, see How Photographers Should Handle Client Album Privacy and Access.
14. Review sensitive photographs and restricted collections
Check whether any photographs require different access from the rest of the gallery. Commercial embargoes, private ceremonies, children, confidential corporate environments or client-requested exclusions may require additional care.
15. Confirm sharing and expiry rules
Decide whether clients may forward the gallery freely and whether it has a defined availability period. If your gallery platform supports expiry dates or expiry reminders and you use them, verify the date before release.
If a gallery will eventually be removed, tell the client rather than expecting them to discover that later.
Download settings and sizes
One of the easiest ways to create post-delivery support work is to send a gallery without testing what the client can actually download.
16. Confirm exactly what can be downloaded
Check whether downloads are enabled for individual images, collections or the complete gallery as intended. Proofing galleries and final galleries may need very different permissions.
17. Check the available download sizes
Do not expose several resolutions simply because the platform allows them. Give each size a clear purpose. A client may understand Print and Archive and Social and Mobile more easily than a stack of technical resolution labels.
Our guide to photo download sizes for photography clients explains how to structure these options around client use.
18. Perform a real download
Download at least one individual photograph and, for larger deliveries, test the complete-gallery or collection download process. Confirm that the resulting files open correctly and that the expected resolution is actually being delivered.
19. Make sure watermarks are not reaching paid final files unintentionally
Watermarked previews can be useful during proofing, but final purchased files normally require a different delivery configuration. Check the downloaded file itself, not just the gallery preview.
Mobile check
Photographers often build and inspect galleries on large desktop displays. Many clients will first open the delivery link from a message on their phone.
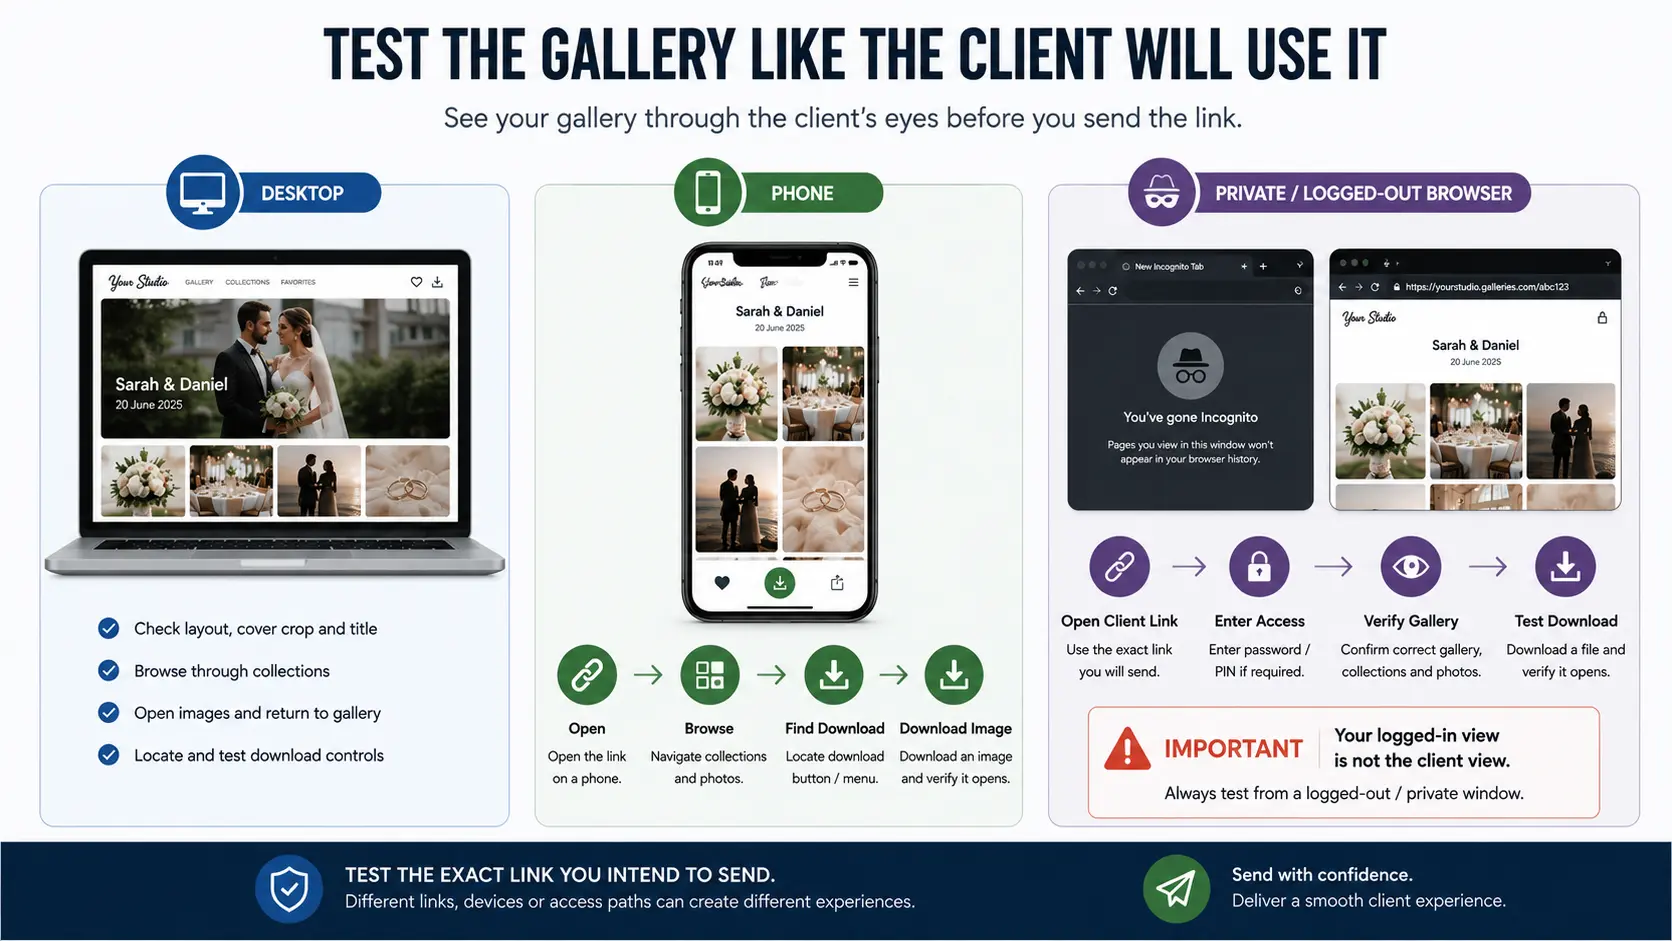
20. Open the gallery on a real phone
Check the first screen, cover crop, gallery title, text wrapping and image loading. Do not assume responsive design means every gallery configuration looks equally good.
21. Browse through the complete mobile journey
Move between collections, open photographs, return to the grid and find the controls the client will need. Navigation that feels obvious on desktop can become less clear on a narrow screen.
22. Test a mobile download
Download one image from a phone if mobile downloads are part of the client experience. Check whether the action is understandable and whether any PIN, email or confirmation step behaves as expected.
This is particularly important for large event galleries where several family members may access the delivery without ever opening a computer.
Client action and next step
The gallery link answers one question: Where are my photographs? Your delivery message should answer what happens next.
23. Write the delivery instructions before sending
Tell the client what the gallery contains, how to access it, how downloads work and anything they must save separately. If passwords or download PINs are required, make sure the correct information travels with the link through an appropriate channel.
A polished gallery still creates unnecessary follow-up if the client does not understand what to do with it.
24. State the next required action and any deadline
If delivery completes the project, say so. If the client still needs to choose album photographs, approve a design, download files before expiry, order prints or provide another approval, make that step explicit.
This is one of the differences between merely transferring files and creating a professional photo delivery experience.
Final link test and release record
There is one check left, and it should happen from outside the photographer's normal logged-in environment.
25. Test the exact client link, then record the release
Copy the exact URL you are about to send and open it in a private/incognito browser or another logged-out environment. Confirm that the link resolves to the correct gallery, access controls behave correctly, the intended images appear, downloads work according to your rules and there is no administrator-only behaviour hiding a problem.
Once it passes, record the delivery date, gallery URL and any important access or expiry information against the job. If another team member later needs to answer a client question, they should be able to see what was actually released and when.
That final record matters because a photography studio may have dozens of galleries live at once. “I think we sent the final one last Friday” is not a delivery system.
A gallery should be released, not merely uploaded
The best photo delivery workflow is not necessarily the one with the most settings. It is the one where the studio knows exactly which files are going out, who can access them, what clients can download and what the client should do next.
A simple rule helps: do not send the gallery link from the same screen where you finished uploading it. Finish the upload, perform the photography gallery quality control pass, view the experience as the client, and release it only after those checks are complete.
GoPickle Client Galleries are designed for organised, branded photo delivery with controlled access, downloads, watermark previews, favourites and mobile-friendly viewing. But the checklist above is worth following regardless of the platform your studio uses. Software can provide the controls; the studio still has to verify that those controls are correct for the job.